How to Remove Paint Protection Film from Your Car Safely and Easily
Step-by-Step Guide to Safely Remove PPF from Your Car
If you’re wondering how to remove paint protection film from car surfaces without damaging the underlying paint, you’re not alone. Paint Protection Film (PPF), also known as a clear bra, is a popular solution to keep vehicles looking fresh and scratch-free. However, after years of exposure to the elements, even the best PPF can discolor, peel, or lose its effectiveness, making proper removal essential.
In this comprehensive guide, we’ll walk you through a safe and easy step-by-step process to remove PPF like a pro. Whether you’re prepping your vehicle for a new wrap or simply saying goodbye to old film, this guide has you covered.
What is Paint Protection Film (PPF)?
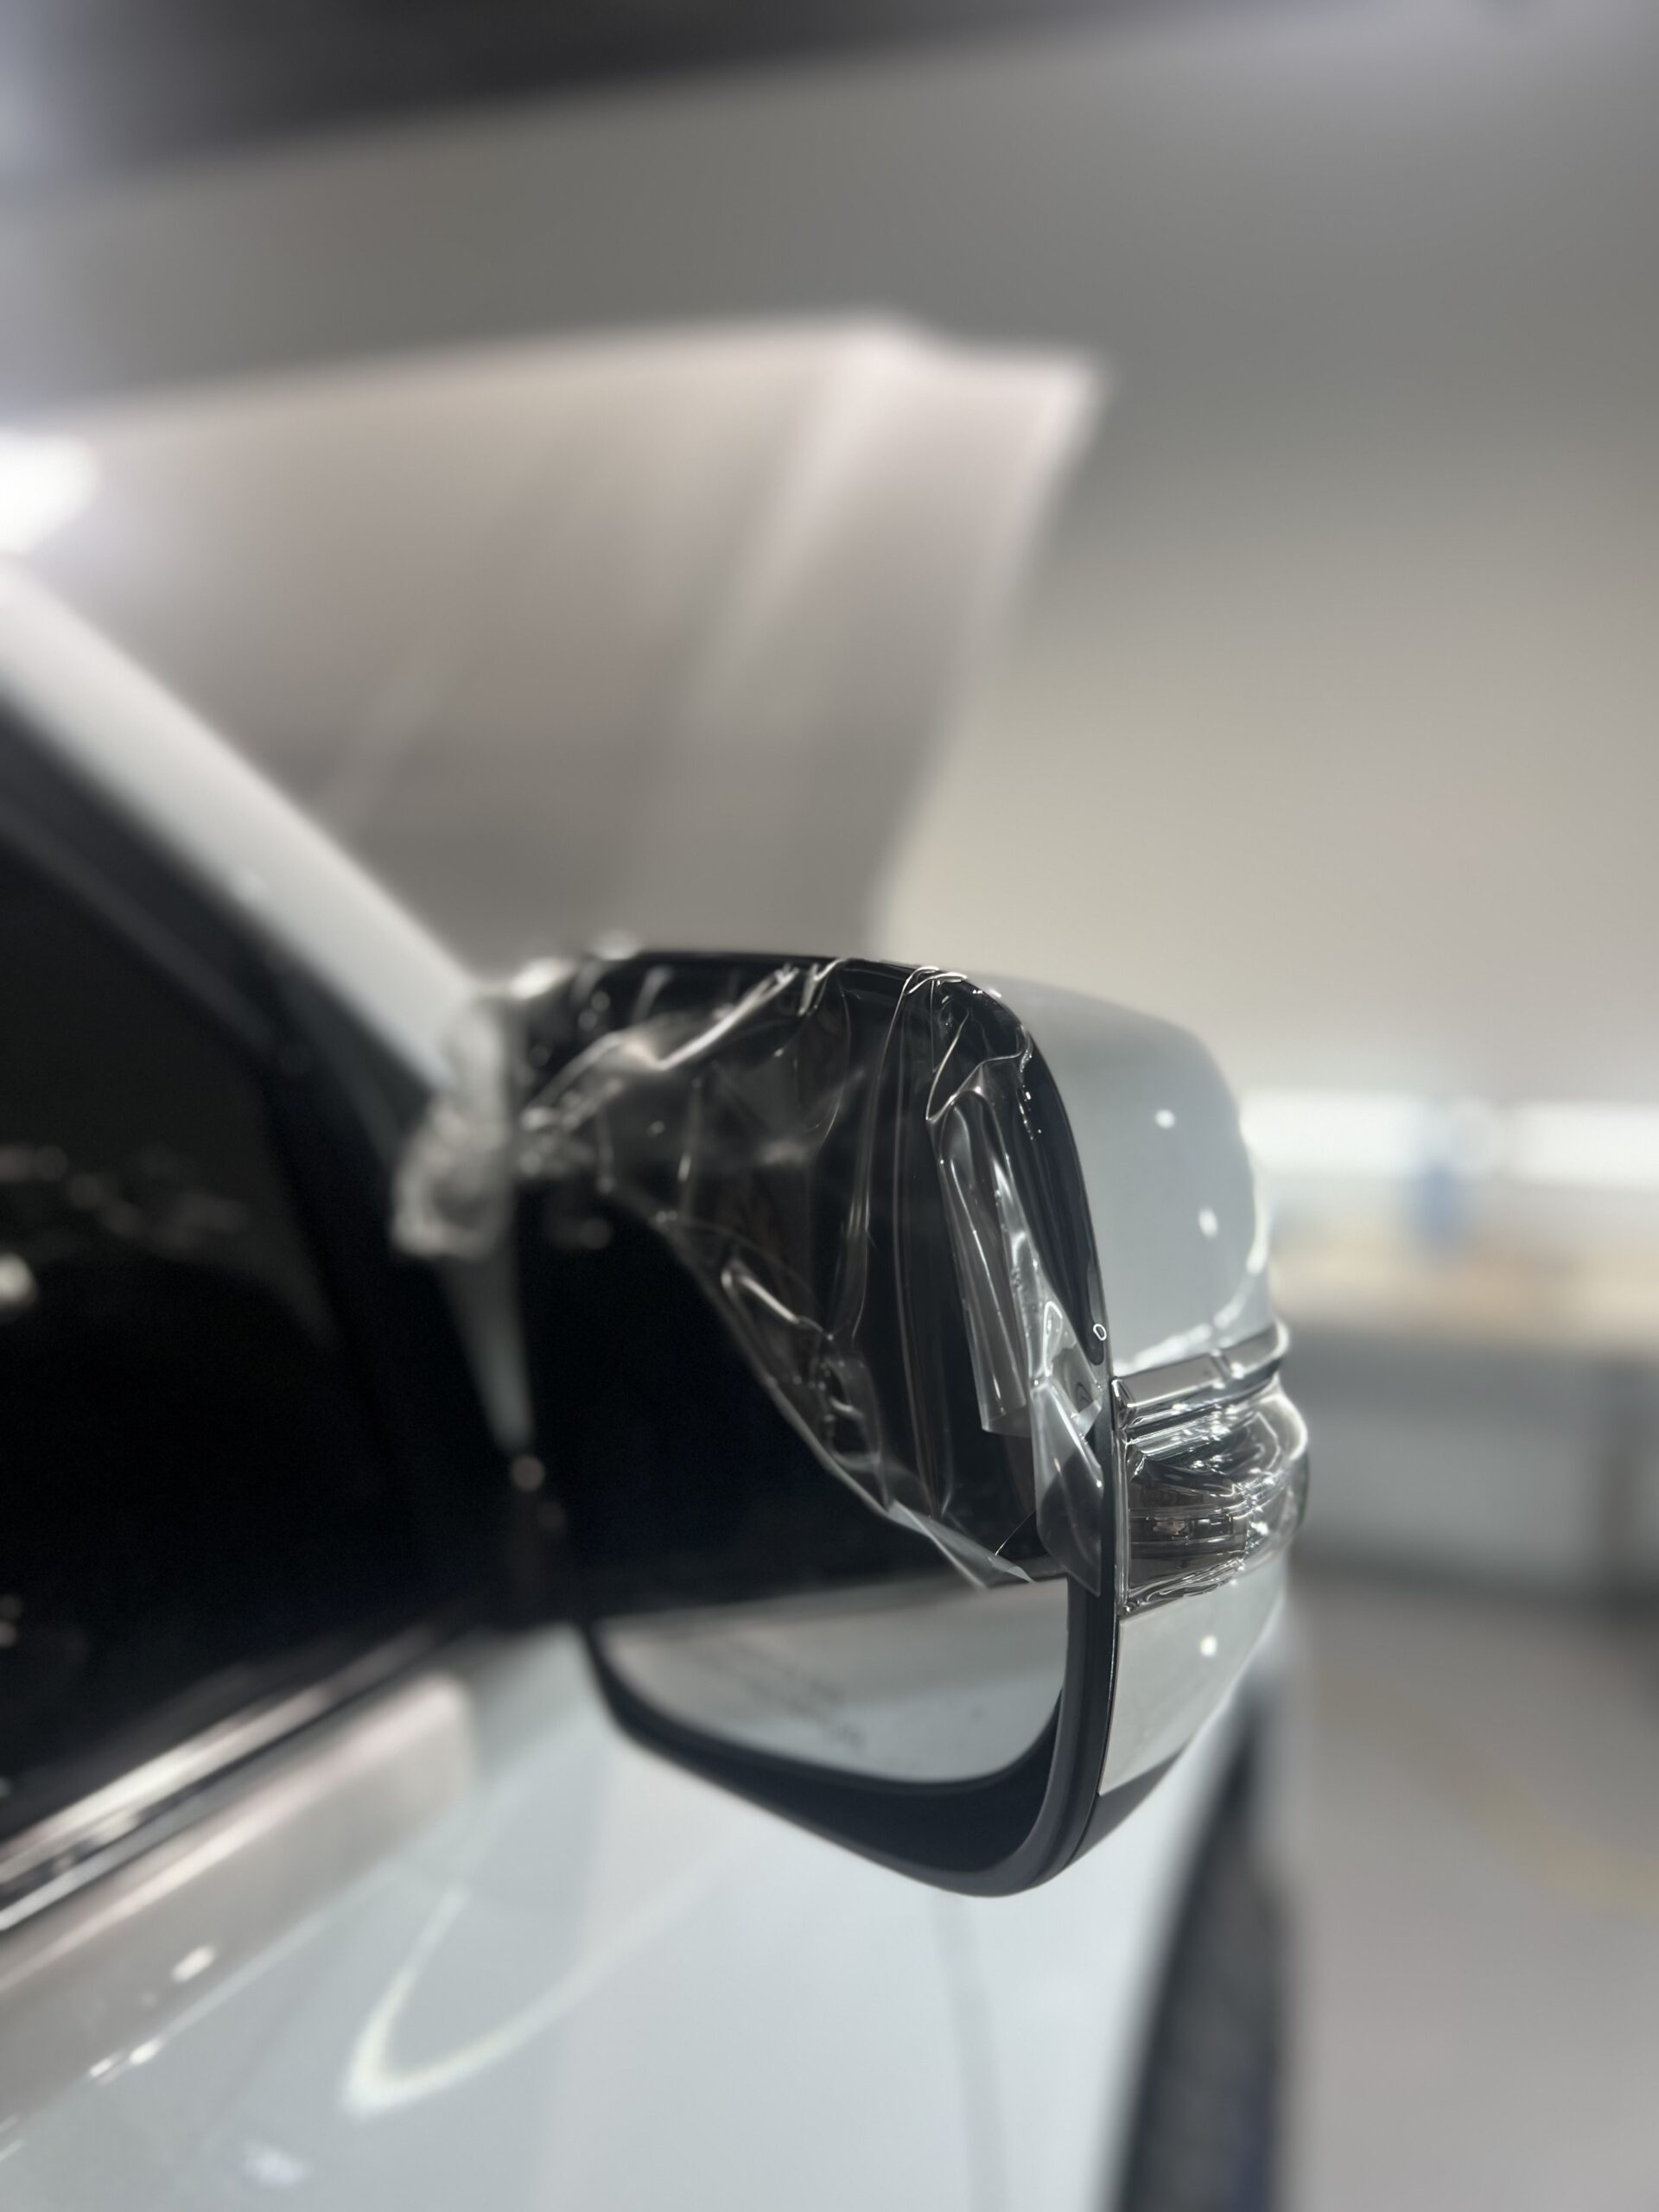
Before diving into how to remove paint protection film from car surfaces, it’s important to understand what PPF is. PPF is a thermoplastic urethane film applied to painted surfaces of vehicles to protect them from:
Rock chips
UV rays
Acid rain
Road salt
Minor abrasions
Oxidation and discoloration
It’s an invisible armor for your car, but over time, even the best PPF needs to be removed or replaced.
When Should You Remove PPF?
PPF typically lasts between 5 and 10 years, depending on environmental exposure and the quality of the film. However, several signs indicate it’s time for removal:
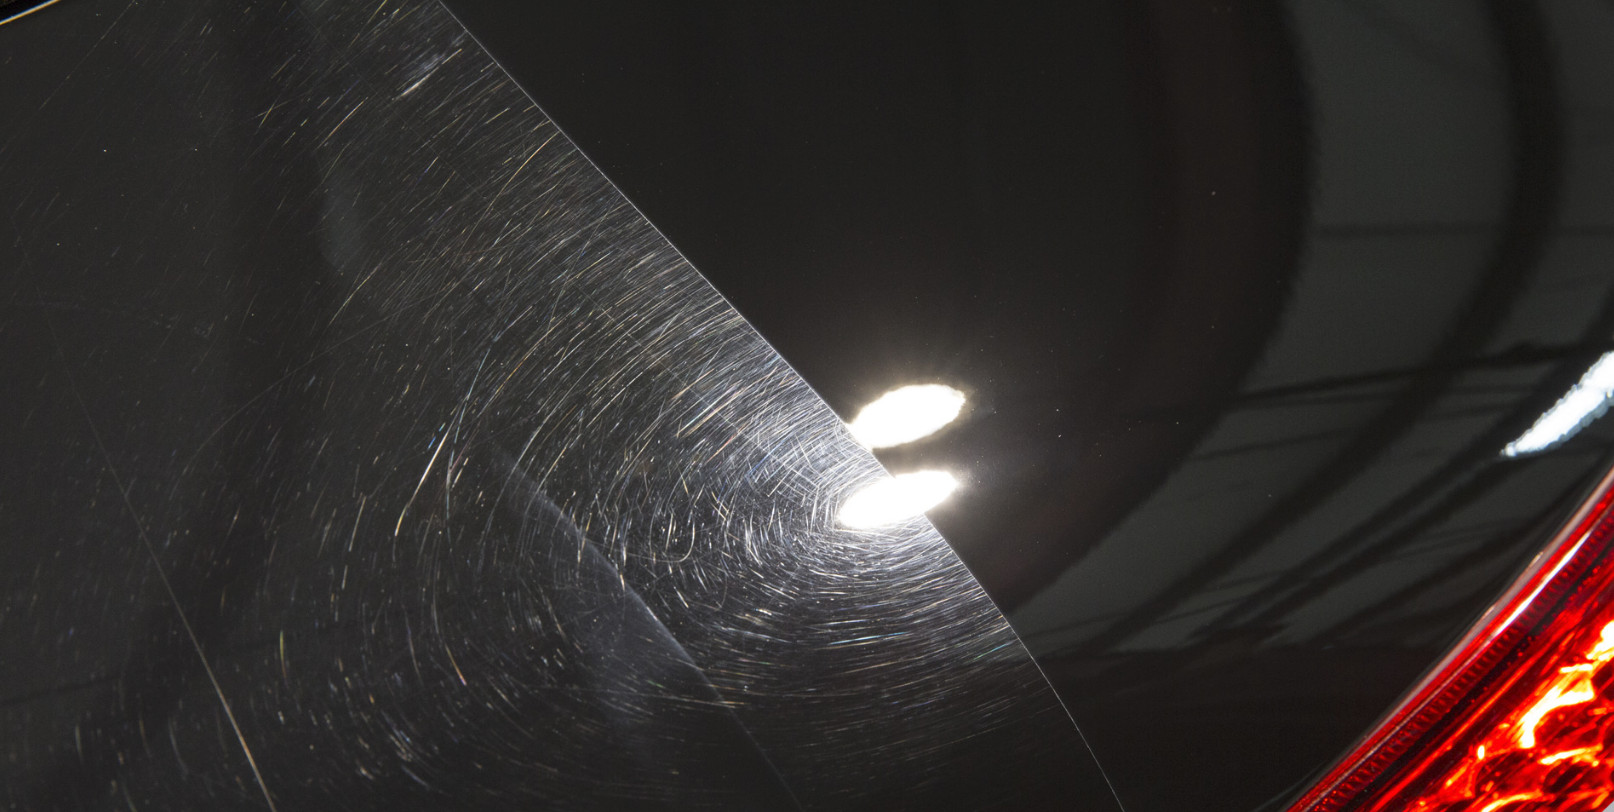
Yellowing or cloudiness
Cracking or bubbling
Peeling edges
Loss of gloss or clarity
Visible scratches or wear
Delaying removal when the film has deteriorated can lead to harder cleanup and potential damage to the underlying paint.
Tools You’ll Need to Remove PPF
Before you learn how to remove paint protection film from car surfaces, gather the right tools and safety gear:
Safety Gear:
Nitrile gloves – To protect your hands from chemicals
Safety goggles – Prevent any adhesive remover from splashing into your eyes
Main Tools:
Heat gun or blow dryer – Loosens the adhesive under the PPF
Plastic scraper or squeegee – Helps lift the film without scratching paint
Microfiber cloths – For wiping and cleaning residue
Automotive adhesive remover – To clean off leftover glue
Optional (But Useful) Supplies:
Spray bottle with warm water and mild soap
Detailing clay bar – For a final smooth finish
Automotive shampoo or cleaner – To prep and clean the surface afterward
Having the right tools will make the entire process smoother, safer, and far more effective.
How to Remove Paint Protection Film from Car: Step-by-Step
Step 1: Clean the Area
Start by washing the car thoroughly using an automotive shampoo. This removes dust, dirt, and contaminants that could scratch your car during the removal process.
Tip: Focus on the panels covered by PPF. Use warm water for better results.
Step 2: Apply Controlled Heat
Use a heat gun or strong blow dryer to soften the adhesive beneath the film. Keep the heat moving; do not let it sit in one spot for too long, or you may blister the paint.
Hold the heat source 6–8 inches away from the surface
Sweep slowly and evenly across the area
Work panel-by-panel or in small sections
The goal is to loosen the adhesive without melting the film or damaging the paint.
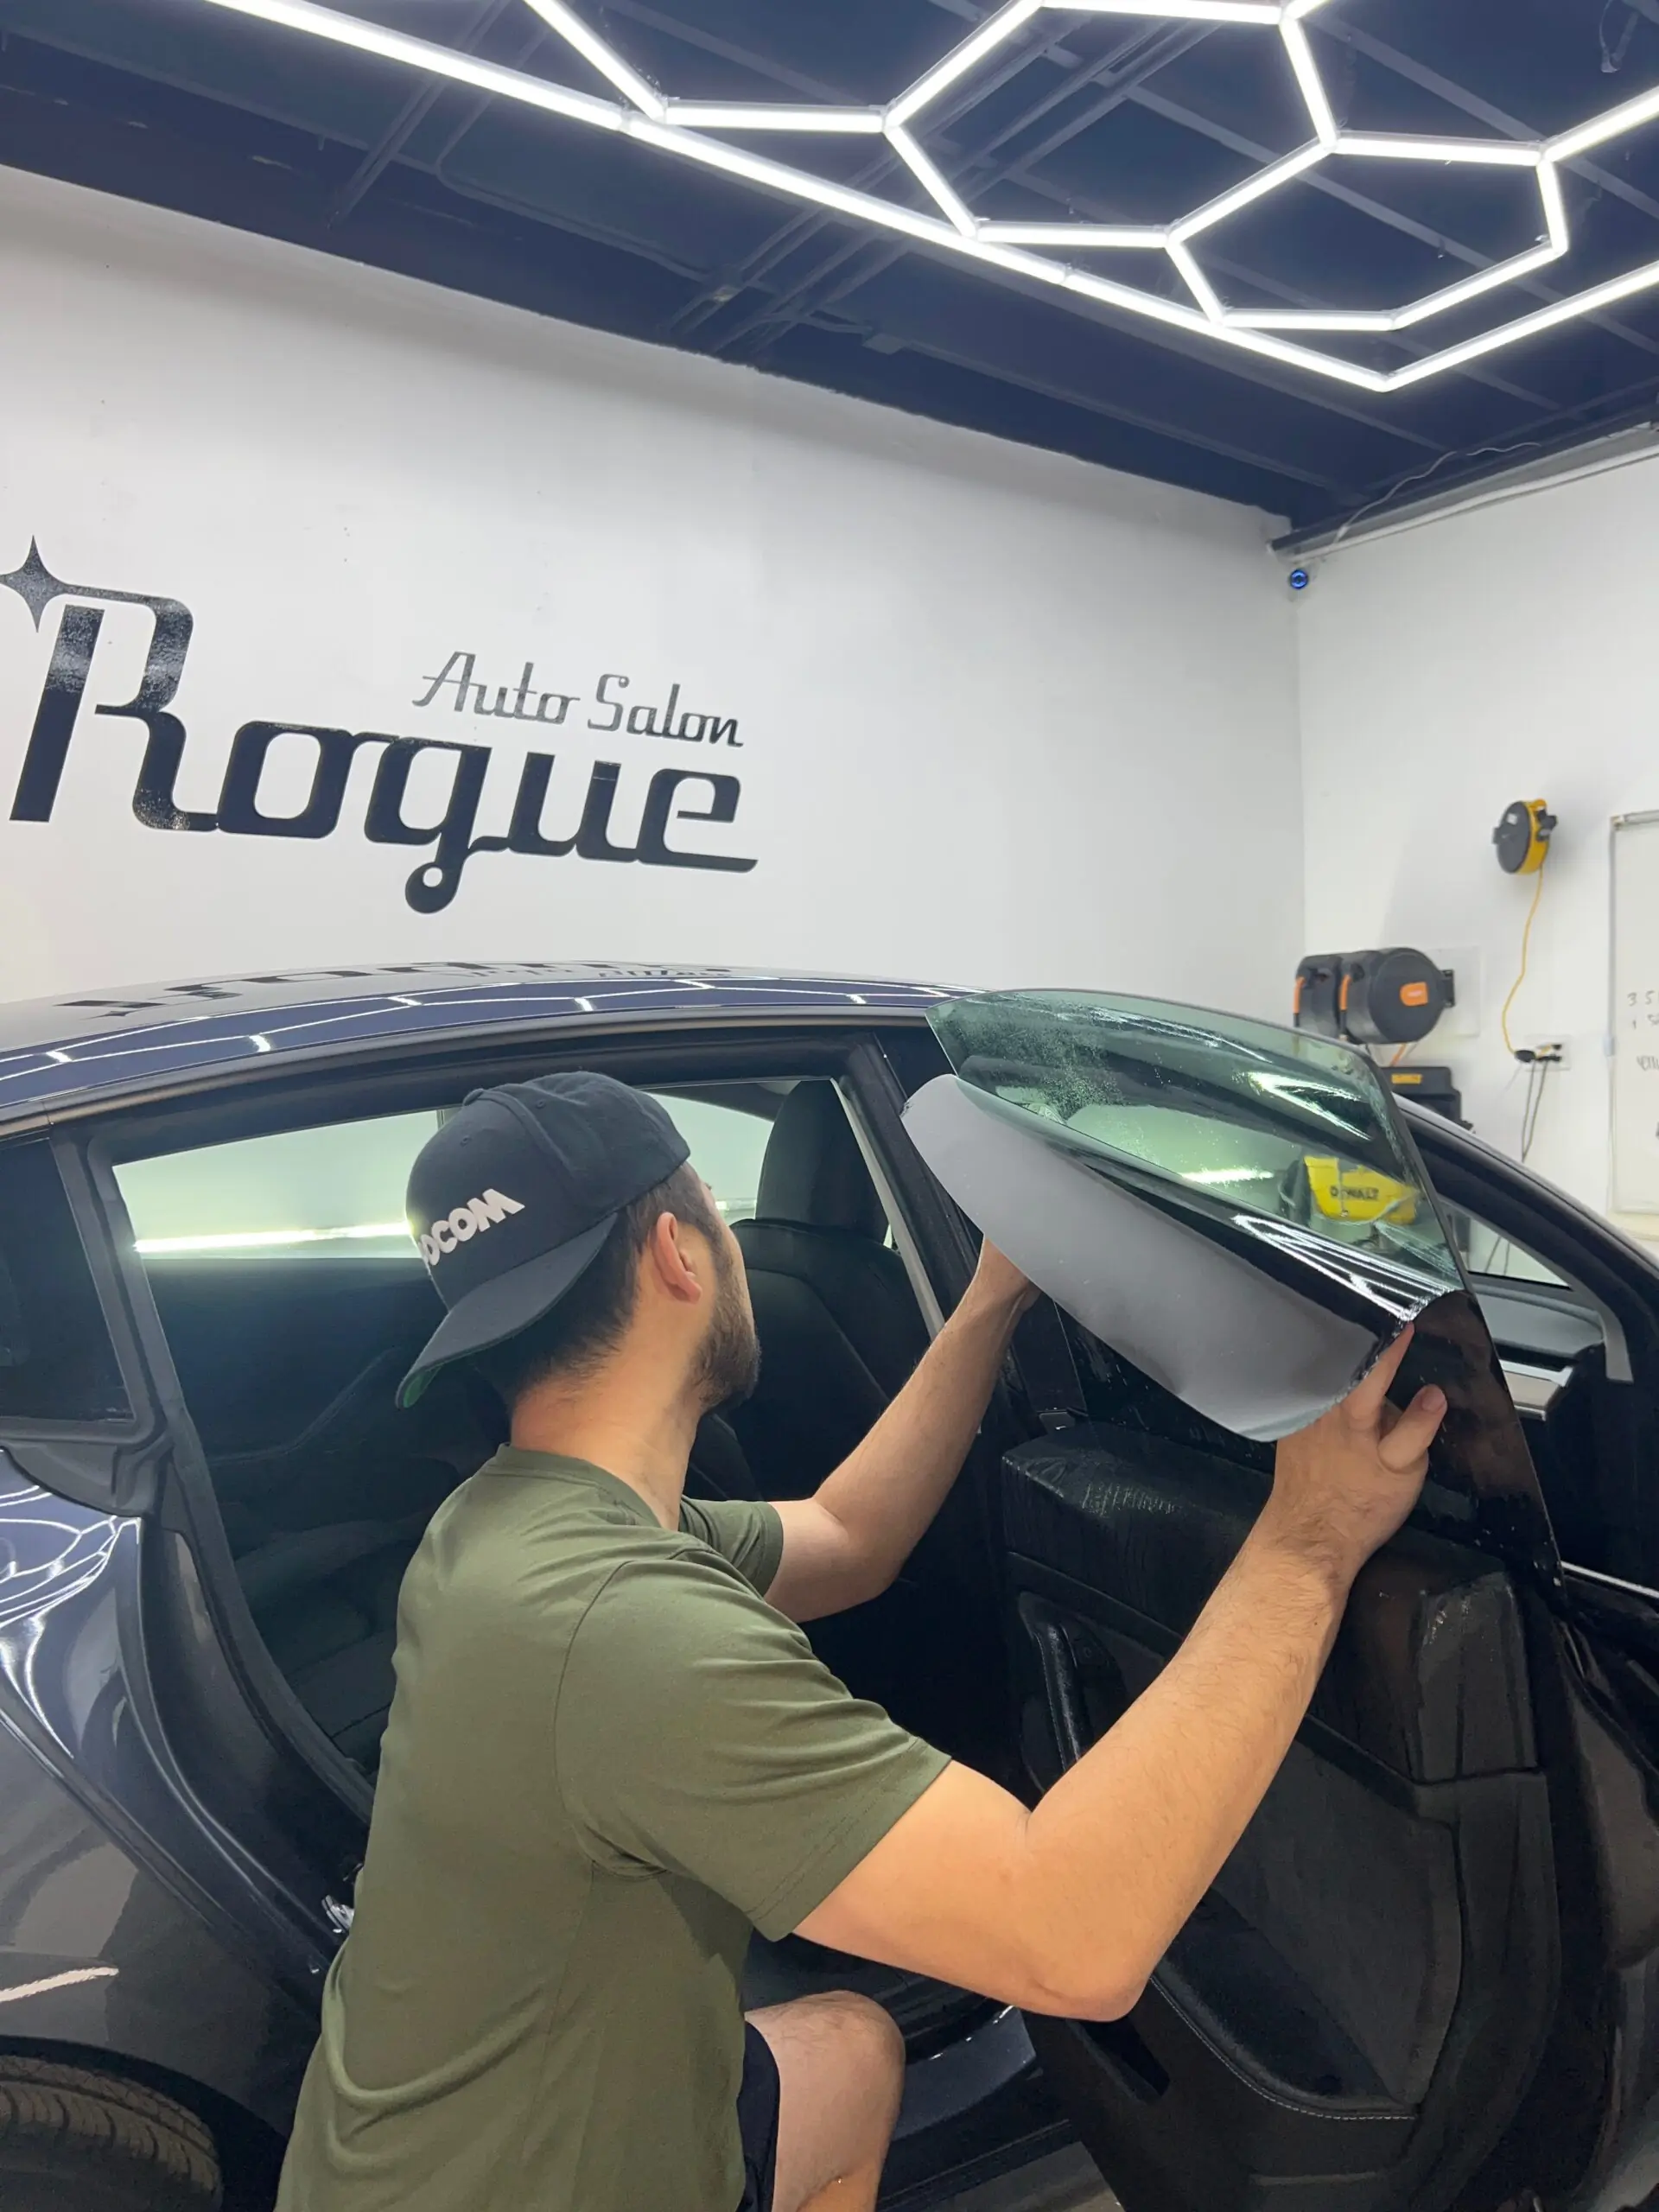
Step 3: Start Peeling the Film
Once a section is heated, gently lift a corner of the film using your fingers or a plastic scraper (never metal). Begin to peel the film back at a low angle (around 45 degrees) while continuing to apply heat.
Go slow to avoid tearing
Use two hands for control
Reheat if resistance increases
Never yank or rip the film off, as this can pull paint or leave chunks of adhesive.
Step 4: Remove Adhesive Residue
Once the film is off, you’ll likely notice some sticky residue left behind. This is where a dedicated automotive adhesive remover comes in handy.
Spray the remover on the affected area
Let it sit for 1–2 minutes
Wipe gently in circles with a microfiber cloth
Repeat if needed for stubborn spots
Some areas may require extra attention, especially if the film has been in use for many years.
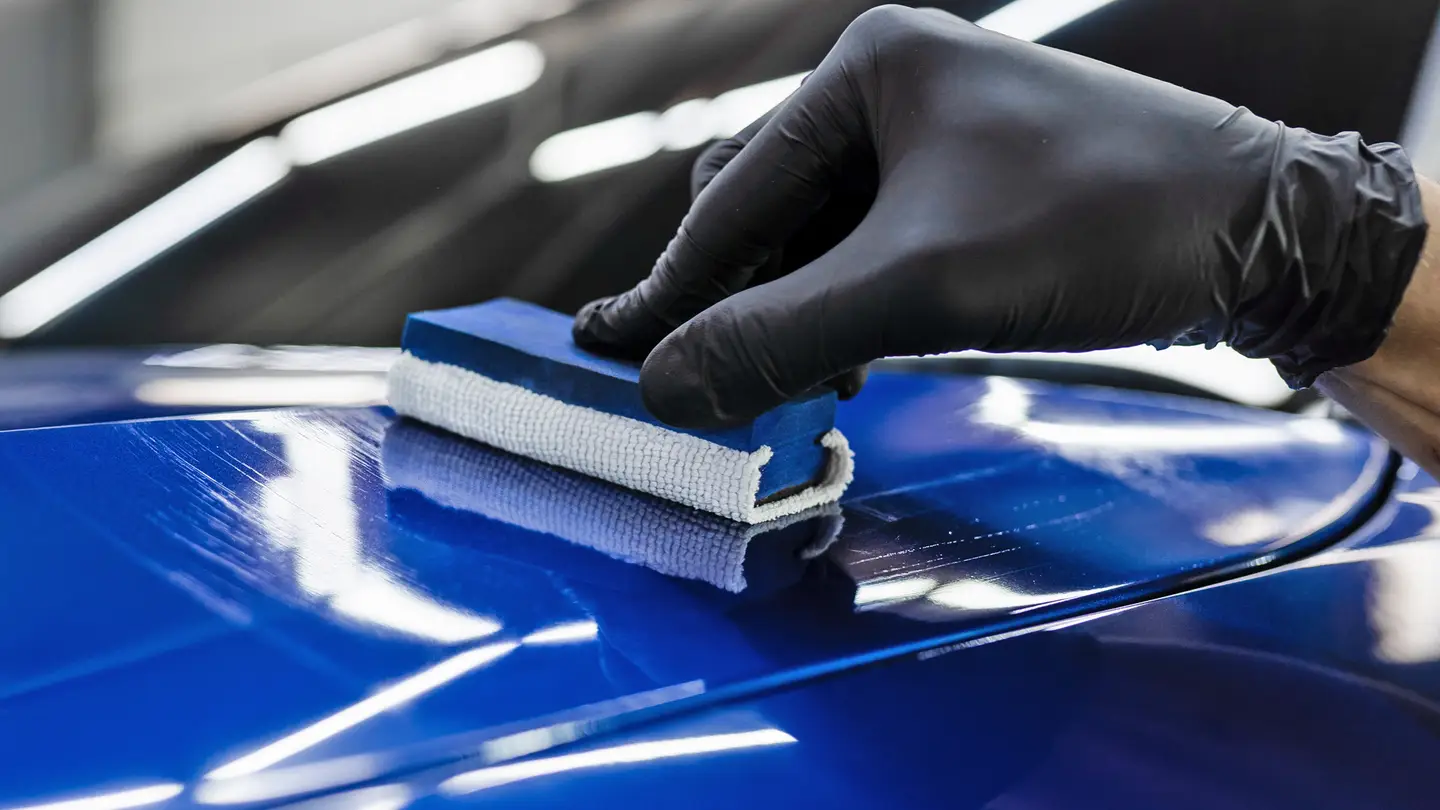
Step 5: Clean and Restore the Surface
After the film and glue are fully removed, give your vehicle another wash to remove any remaining chemicals or debris. Then, apply a layer of wax or sealant to protect the exposed paint.
Use a clean microfiber cloth to buff the surface
You may also clay bar the surface for a smooth, contaminant-free finish
This final step not only restores shine but also preps the surface for a new PPF application if desired.
Post-Removal Aftercare: How to Keep Your Paint Protected
Once you’ve completed the process of removing paint protection film from car surfaces, you’ll want to preserve the paint’s condition. Here are a few tips:
Avoid automatic car washes for at least a week
Apply a high-quality wax or paint sealant
Hand wash with pH-balanced automotive shampoos
Consider professional detailing once a year
Bonus: If you’re planning to reapply PPF, the newly exposed surface will now be clean and ready for a fresh install.
Mistakes to Avoid When Removing PPF
Knowing what not to do is just as important as knowing what to do. Here are some common pitfalls:
Overheating the Paint: Excessive heat in one spot can cause the paint to blister or discolor. Keep the heat gun moving.
Using Sharp Tools: Avoid using metal scrapers or knives. These can easily gouge or scratch the paint.
Pulling Too Aggressively: Yanking the film off in a rush can pull up paint, especially if the adhesive is still strong.
Letting Chemicals Sit Too Long: Adhesive remover can damage paint if left on too long. Apply it in small sections and wipe it off quickly.
Professional Help vs. DIY Removal
While this guide gives you everything you need to remove PPF yourself, there are situations where professional help is advisable:
The film is older than 10 years and heavily baked on
You notice paint already lifting or chipping
You don’t have the necessary tools or experience
Professional detailers use steamers, industry-grade adhesive removers, and paint-safe techniques that minimize risk.
Tip: If you’re unsure, get a quote from a local detailing shop before starting.
Final Thoughts
Now that you know how to remove paint protection film from car surfaces safely and easily, you can confidently tackle this task at home or decide if professional help is the better choice.
Remember, the key to successful PPF removal is:
Patience
Proper tools
Controlled heat
Gentle technique
Taking the time to do it right ensures your car’s original paint stays pristine and protected for years to come.
If you’re planning to reapply a new PPF, make sure the surface is completely clean and sealed before installation. And if you’re not sure about your DIY skills, don’t hesitate to consult a certified auto detailing expert. Our folks here at Rogueautosalon are ready to help make your PPF stand out!